 All-in-all I am very happy with my upgrade from Windows 7 to 10. The procedure was smooth and almost (more on that later) everything still worked like a charm, out-of-the-box, despite having lots of not-so-obvious software on the machine. (Comes with the job as a developer, I guess.)
However, one minor thing very soon annoyed me on Win10 and that was the crappy user experience for connecting to a VPN, despite that shiny new VPN button in the new Action center (btw, action center tip: use WinKey+A), which in itself looked like good idea. I have quite a list of VPN’s defined, first of all to connect to my own office while on the road, and many others to connect to my client’s networks to diagnose problems or perform software updates. So allow me to first complain a bit about what I think is wrong with it, before presenting a workaround (or solution if you will) below.
Compare the following experience on Windows 7 versus that of Windows 10 (or Windows 8).
Windows 7
Easy way to connect
- Click the network icon in the system tray.
 It will list all your VPN connections:
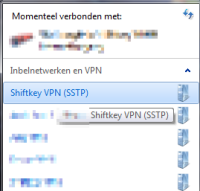
- Double-click the VPN connection you want. Done!

Even easier way to connect
Create a desktop shortcut to the VPN by going to the Network Adapter Settings and dragging the VPN icon onto the desktop.

- Double-click the VPN icon on your desktop. Done!
Windows 10
Easy way to connect?
At first, it appears as if you can still do the same as you were used to.
- Click the network icon in the system tray.
 It will list all your VPN connections.
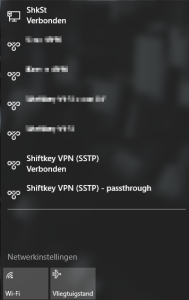
- Double-click the VPN connection you want.
Done.No, this will open a new window, which lists all your VPN connections, again. (Huh?)

- Find the same VPN you double-clicked before in this list. Double-click it.
Done.No, double-clicking doesn’t work here. Single-click it.
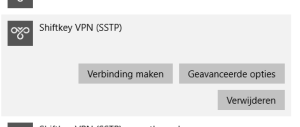
- The VPN item expands, now showing a Connect button. Click that.
- The VPN connects. Click the X to close this window.


That is five actions instead of two.
Even easier way to connect?
It gets even worse here.
That desktop shortcut I created while on 7 was migrated to Windows 10 perfectly fine, so I figured let’s keep using that.
- Double-click the VPN icon on your desktop.
Done.No! This also opens this dreaded window where I have to select the same VPN from the list, again, and perform three more unnecessary clicks where a simple double-click should have sufficed.
That is four actions instead of one.
I find it hard to believe there was no usability expert that has noticed this. It is plain silly UI: why list the VPN’s first from the system tray and allow you to click them, only to make you find and click the same one again from a new window? It makes that first list completely senseless.
Personally, it appears to me like a simple oversight that may be fixed in a future update.  For example: the procedure to create a shortcut to a VPN by dragging it from the adapter list to your desktop still works in Windows 10. This shortcut then even features a context menu items that says Connect / Disconnect. That would make you think it would do precisely that: connect to that VPN. But it doesn’t. It just opens the VPN list window. Why?
The workaround
Fortunately, there is a way to script yourself around this. Enter the rasdial command! (Which also exists on Windows 7 BTW.)
- Create a batch file on a convenient location and edit it.
- Paste the following lines (note the use of quotes if there are spaces in the VPN name). The first line is optional.
@echo off
rasdial "My VPN connection name here"- Save
- Create a shortcut to this batch file on your desktop.
- Optionally give it a nice icon. I took the 115th one from %systemroot%\system32\imageres.dll.


Now, if you double-click the icon on the desktop, you get a brief command window instead of a gui, but the message is the same:

And you just connected to your VPN with a only one double-click. Sigh.

Plaats een reactie